Getting Started with the Mappia Helm Chart
The Mappia Helm Chart is a Kubernetes manifest package that allows you to define, install, and upgrade Magento 2 applications running in Kuberentes. This tutorial will guide you through the process of pulling the chart on your local machine and deploying it to your Kubernetes cluster.
Step 1: Install Helm
Before we can get started, we first need to install Helm on our local machine. Helm is a package manager for Kubernetes and allows you to easily deploy and upgrade applications into your cluster. To install Helm, follow the instructions for your operating system at https://helm.sh/docs/intro/install/.
Step 2: Login
Next, we need to login to the Mappia Registry in order to get access to the chart. You can retrieve your username and password from your account.
helm registry login -u $YOUR_LICENSE_USERNAME mappia.azurecr.ioStep 3: Install the Mappia Helm Chart
Now that we have Helm installed and we can access the registry, we can install the Chart. To do this, run the following command:
helm install my-mappia oci://mappia.azurecr.io/helm/mappiaTIP
You can change the release name my-mappia to anything you like.
This will install the Mappia Helm Chart and create a release named "my-mappia".
Step 4: Verify the Deployment
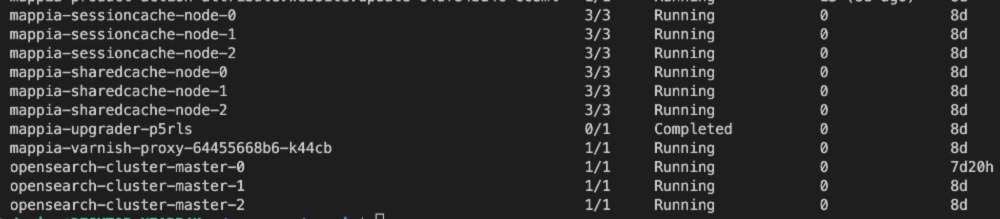
Once the Mappia Helm Chart has been installed, you can verify that the deployment was successful by running the following command:
kubectl get podsThis will show you a list of all the pods in your Kubernetes cluster. You should see something like:
Step 5: Access the Magento Installer
Now that the Mappia Helm Chart has been successfully deployed, you can access the Magento 2 application installer by running the following command:
kubectl get pods | grep "installer" | awk '{print $1}' | xargs -I{} kubectl exec -it {} shThis will give you a shell onto the installer pod where you can run the installation commands for your Magento store.
Step 6: Disable installation mode.
helm upgrade my-mappia oci://mappia.azurecr.io/helm/mappia
    \ --atomic
    \ --set installer.enabled=false
Conclusion
In this tutorial, we've covered the basic steps required to install and deploy the Mappia Helm Chart to your Kubernetes cluster. With Mappia, it's easy to manage Magento 2 applications and keep them up-to-date with new releases.